Friday, September 10, 2010

DIY Pirate Party: Eye Patch


Hello! Hope you have been following my Pirate DIY Party this month as this is the second installment; here is the first, DIY Pirate Invites.

This week we are delving into a world that lacks depth perception... Yup, were doing the famous pirate eye patch! These are so easy to make and ridiculously cheap! I probably spent 5 dollars on enough material to make 15 eye patches. This would be super fun to actually do at the party so the kids (or adults for that matter) can put their own twist on it. Here we go!


Supplies:

Black felt (enough for your attendees, about 1.5” square per person)

White felt (same amount as black)

Black Stretchy Cord (I have a child-sized head and used about 18 in to loop around my head)

Scissors

Hot Glue or Regular Glue if you want to make it kid-friendly

Sharpie

Step One:

Cut about a 1.5” square out of the felt (you could probably do a 1” for kids)


Step Two:

Fold the square in half. Then cut a slight curve on the very top half of the square. On the bottom, cut a more “u” shape. Unfold and make sure its the shape you want. I spent maybe 3 attempts to get it perfect. (or you can use my template)


Step Three:

Using the first template you made, cut out as many patches as you need.

Step Four:

Cut two small slits in the top of your patch so the stretchy cord can slide through, Like this (the pencil is just to show contrast):


Step Five:

Cut out your stretchy cord to your desired length. Like I said earlier, my head is tiny, about the size of an 8 year old and I used a foot and a half of cord. Have your kids be the model or, if its an adult party, you be the model!


Step 6:

Thread your stretchy cord through the slits and tie off.


Step 7:

Using the white felt, draw a “jolly roger” that fits your eye patch. Then draw in eye holes with your Sharpie.


Step 8:

Put it on and look FIERCE!


Supplies:

Arg!

Okay, that picture is ridiculous. But hey, I always say if you do it with confidence, no one will question you. So I hope you go make your eye patches in confidence, now that you’ve got a little know-how!

Until next Friday for DIY Pirate Party,

its Christine

Just Loverly

ps Another good pirate-themed band is Flogging Molly. Though again, probably not for kids. I’ll find a good one next week for the kiddos!


Thursday, August 26, 2010

Clip Art Frames: For Those of Us Who Are Vector Impaired!

I was working on designing a stamp when I came across this AWESOME website called Just Something I Made. I have a really hard time finding cool files to use in my business and in every day life because I don't know have to program or the know how to download vector files. But at JSIM I found some great frame files to download for just about anything!


Here is something I whipped up with one of the frames.
This would be so cute to put on the sweetheart table at a wedding or even as the header for personalized stationary; There are endless possibilities for invitations, announcements, wedding signs and anything you want. I feel another DIY coming on soon!

And Thanks to Cathe at Just Something I Made. I will do only good things with these frames!


Wednesday, August 25, 2010

Learning How To Run A Business (And Why I Will Never Be Martha)

I am the type of person that just jumps into a project with minimal experience and only the basic know how. That being said, I usually learn on a curve and the first time I try something new it never works out exactly how I had it in my head, but that is okay with me. I could probably be more prepared, talk to people who already are skilled or research some common mistakes. Unfortunately, that doesn't sound so fun.I like the idea of getting messy, making mistakes and learning from my experiences; it's all very exciting!

This is why I will never be Martha Stewart.

What it means though, is that I now a have a world of learning curves to share with you, which is why I decided to blog! I want you to get to know me and my struggles of learning how to run a business. I am also starting to learn how to take other people's advice, so I will share that too.

Besides business related topics, I want to share my inspiration and my creative process. I am also kind of obsessed with DIY's so there will be plenty of those as well.

This is my life, me getting messy and learning how to run a business. It's gonna be rad.


Wedding DIY Heaven: The story of how I decided to become a business owner

"Let the great experiment begin!"
Tobias Funke

Last summer marked the beginning of a new phase in my life: I was getting married to the most wonderful man ever, Jacob, plus we were buying a house in OKC and I got laid off from my office job all with in 2 weeks of each other. It was quite an exciting time; I love change! I had also been having a blast obsessing over wedding decor for the past 9 months and totally loved doing my DIY wedding. Everything but my wedding dress and the guys suits were handmade! Here are some of my fav DIY pic from ourwedding:

Shout out to Abigail Smith, our amazing photographer!
We had a few different punches, so we thought drink stirrers would be the perfect way to tell everyone's drinks apart!
We had hung this "J" for Jacob and put moss behind it to match our blue and gold bird themed wedding.
Instead of a slideshow, we hung pictures on the fence that lined our venue. The pictures chronicled our lives before we met each other, symbolic of our lives starting separately, but ending as one.
This is the first banner I made, and one of the staples of my business. We took our family pictures in front of it and they turned out great! Also, Jacob actually helped make this so I have to give hip props too! I can't forget, my amazing Day-Of Coordinator, Delia, who helped me through so much!

Anyways, With all the compliments Jacob and I got from friends and family, realized I had a penchant for designing and pulling together a wedding. This is what I was born for! (okay, a bit dramatic, but I'm good at it)

Even though making parties personal and beautiful was my calling, I still didn't have any notion that I should strike out on my own. All last year, I had been keeping up with the craft blogs, learned how to sew a great purse in a few short hours and had helped with a couple friends weddings. It wasn't until May that my sister asked if we could have a party at my house that I got the idea.

Katie's birthday is May 22nd and that whole week before I was so excited to help with her party! I decided which dishes we should use for food, what exactly to make and also a few decorations. I decided to make a "Happy Birthday" banner for her to hang outside and as I was making it, I kept thinking "this is so freakin cute!" I decided by Saturday (her birthday) that I was going to start a business on Etsy. And THAT was how Just Loverly was born!

Of course it has taken me a while to find my creative voice, figure out the best way to personalize party decor and design my brand, but I am slowly getting there.

I draw lots of inspiration from my own wedding, what worked and what didn't, but I also am trying new things like party invitations, cake stands, plates and napkins (pics by Anna Lee Media)

So now, while still teaching at Victory Dance in Oklahoma City, I am trying this whole new way of life and I LOVE IT! I just hope I can make this a viable business that will last for a long time!

Wednesday, August 18, 2010

DIY: How to Turn Your Husbands Pitted out T-Shirt into a Racerback Tank Top *Part 2*

Step Three- Back it up
Lay your Fav Tank on top of the back of the Old Tee and trace the "racer" part of the tank. To make sure the shirt is symmetrical, fold it down the center and cut along the traced line. I had to fudge the line a little because the front straps were in the way, but just try different lines till you have the one you like.

Step Four- Stitch and wear!
Now that we have all the straps done, just gear up your sewing machine and sew along the side seams using a zig-zag stitch. You dont have to sew the straps up because of the nature of tee shirt material.
HOW FREAKIN EASY WAS THAT? I literally did this while watching one episode of A Baby Story AND taking pictures. (Sorry about the quality, they will get better!)

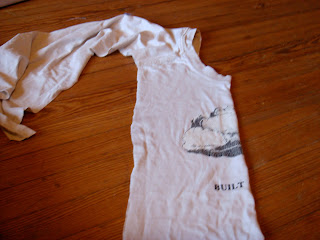
Here is me looking totally awesome in my new Built To Spill shirt.


DIY: Turning your husband's pitted out t-shirt into a Racerback Tank Top *Part 1*


Jacob has all these really cool band t-shirts from back in the day that I totally love. Unfortunately they look like crap because of the pit stains, and general wear and tear. So I am here to give his old tees new life!

Here is what you need:
Oversized tee
Favorite racer back tank top
Scissors
Sewing Machine (Or needle and thread)
Pencil or disappearing ink


Step One-Half It
Lay your Fav Tank on top of the Old Tee and cut along the sides of the tank top all the way to the top, cutting off excess sides and sleeves. This will put your Old Tee into front and back halves. MAKE SURE to leave a seam allowance so your Old Tee isn't too tight.

Step Two- The Ol' Trace and Cut
Lay your Fav Tank on top of the front of the Old Tee and trace the outline of the front strap on the left side. Then, just to make sure your shirt is symmetrical, fold it down the center and cut along the traced line. MAKE SURE to leave the front and back connected, otherwise, its more work for you!


Part 2 comin up!


Saturday, August 14, 2010

Can't Burst My Bubble

This week I had a lightening stroke of brilliance that was sparked by some exercises in creative thinking. I was trying to think of all the different ways I could vary the products I have by making them less expensive to purchase. After bouncing a few ideas around in my head I realized that a great way to do something affordably is to make it mini! I mean if you want a Coach purse but cant afford the original handbag, you buy the clutch or the wallet, right? So I thought I could make mini banners for centerpieces or put on top of cakes! That way, you could save money on a home made cake while still having it personalized! I have never seen anyone do it (and I have researched banners a lot), so after fantasizing about how incredible my idea was, I went to sleep perfectly content with myself.


On Friday, the very next day, I get an email from the lovely Sara, a client that I am helping with decor and day of preparations for her wedding. She sends me this picture:


and I about start crying.


Okay in hindsight my idea is pretty great with lots of great options for personalizing, but it's not a cure for cancer; it's a fairly simple idea. Lots of people in the decorating business could have and have thought of this. But I was so excited about my idea that it was kind of hard to take.


All yesterday evening I was feeling kind of defeated, like I had let all the air out of my balloon. I was feeling sorry for myself that I didn't think of it sooner and had a plain give-up attitude.

For the record, that is not a good way to go through life, or to try and run a business.

As I am reflecting on the events of the last day, (ie rethreads) I am remembering that to get what you want, you have to work hard for it. And there are free things in life, but you still have to put in the work to get them. So I have decided not to let my attitude be defeatist, but to work hard to make a quality product that is original to me and my style. That's all I can be is true to myself and what I believe in.

Okay, be ready for some cool process pics on the development of my new Mini Banner!